Author

Table of contents
RentSpree Dashboard 2.0 works faster and harder with new features that help you streamline multiple listings and applicants.
“What if I list more than one property?” “What if more than one person applies for a single location?” “How can I see who applied and to where?” At RentSpree, we hear you. And it’s no surprise that property managers, salespersons, and leasing agents need to save time. As rental markets surge, it is clear that having a quick, easy, and affordable way to manage rental applications and screening is essential. Asking for regular resubmissions and fishing through different pages is no way to keep our clients happy. That’s why we’re unfolding RentSpree 2.0. It works faster and harder with new features that help you streamline multiple listings and applicants. Basically, we wanted to make your life easier.
The differences are seen on the RentSpree dashboard. From there, the lessor can see different property listings all at once (fig. 1.0). The goal is to allow a user to list several properties well before applications are submitted. This helps you organize and add potential renters as you see fit.
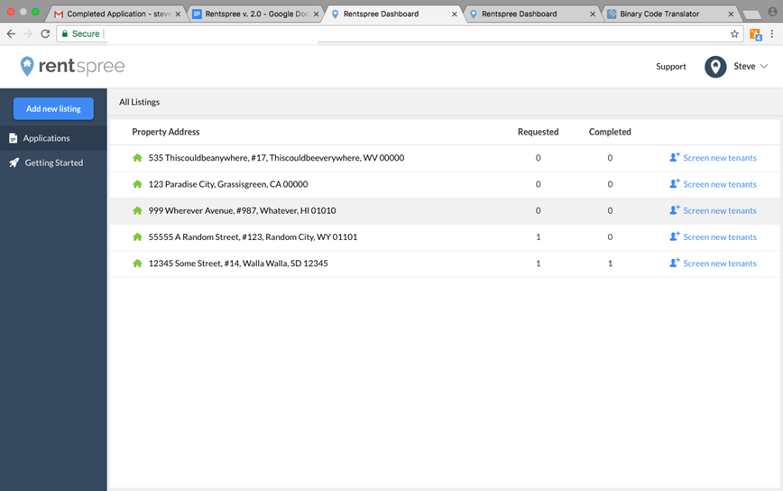
fig. 1.0
All you need is an email address to apply to each property. So, simply click on a respective property and submit the applicant’s email address. (fig. 1.1).
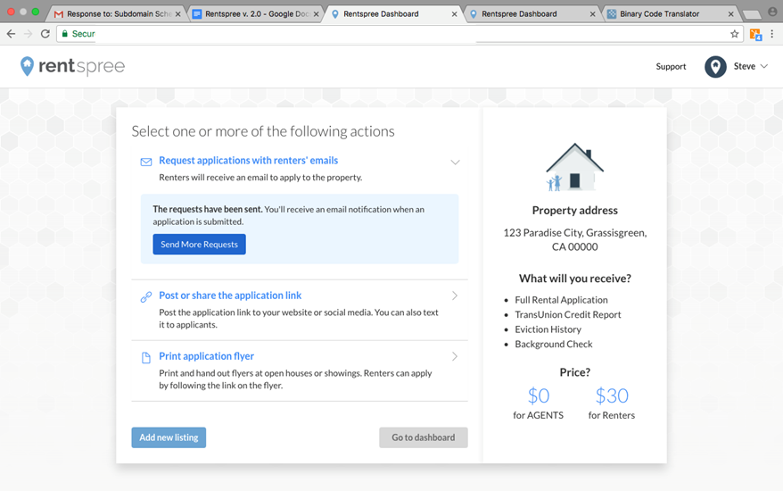
fig. 1.1
But how do you see whether an applicant has even begun the process? Simply click on the specific property listing and you can see how many applicants are listed and where they are in the process. We also allow you to see their information right on the “Dashboard.” There’s no need to dig through completed applications, downloads, or PDFs to access quick and easy information. In this example, Steve W has not been attentive to the application email and may need a friendly reminder in order to get the ball rolling (see fig. 1.2). But one can see what each column lists: credit score, criminal history, eviction history, and monthly income. This allows you to see pertinent info for making the right decision for your needs.
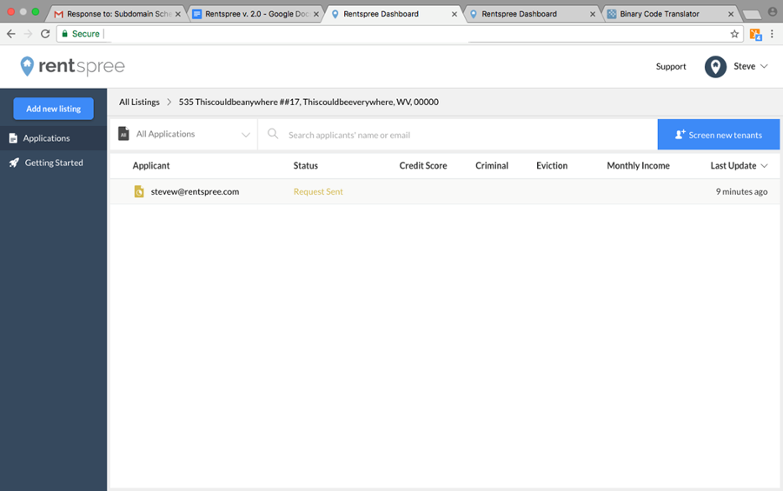
fig. 1.2
We at RentSpree are always happy to help you and welcome your calls. But if you find yourself needing some onsite assistance in a self-directed way, we have you covered. Simply click on the “Getting Started” rocket icon on the lefthand side of your dashboard and you’ll find helpful tutorial videos that should answer most of your needs (see fig. 1.3).
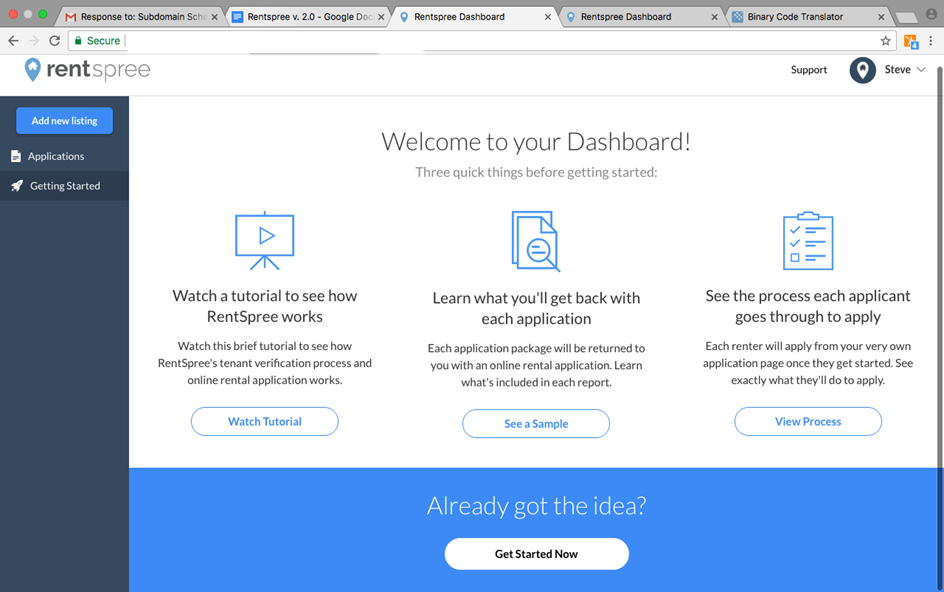
fig. 1.3

Save time on marketing, screening, and payments. Join over 2 million agents, landlords, and renters using RentSpree.


_tiny.png)